Create a group
This article explains how to create user groups in the roommaster Web app and manage file sharing for those groups.
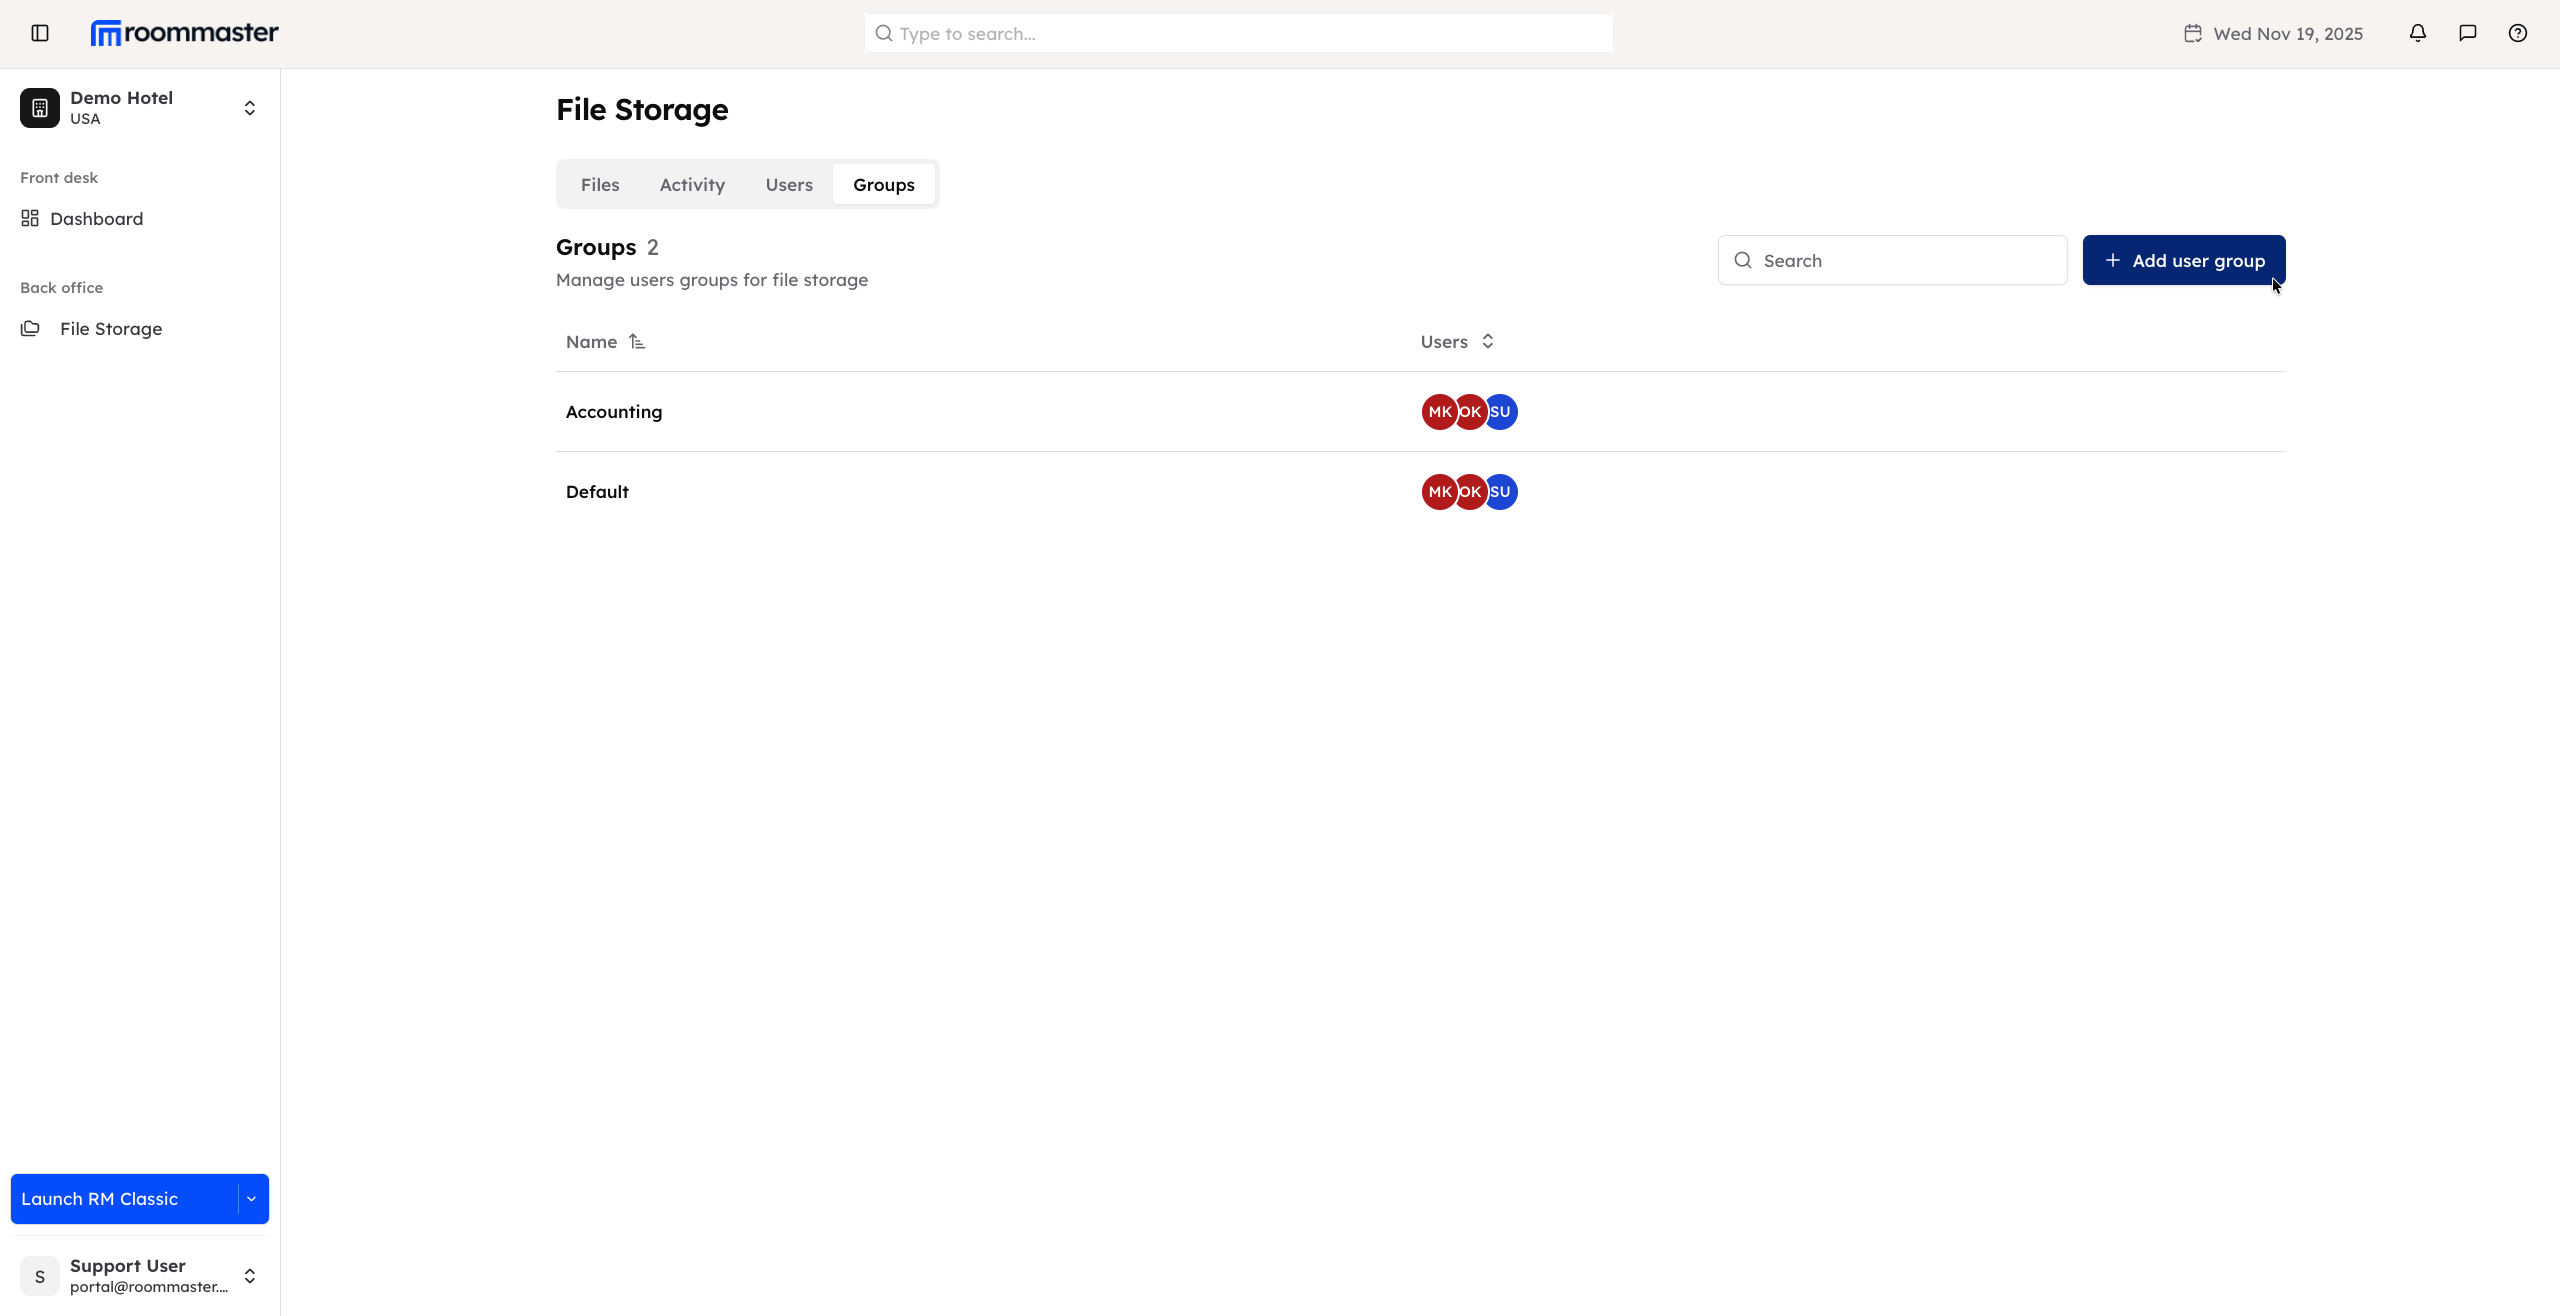
Accessing the Groups tab
- Only users with upper permissions and manager roles can access the Groups tab
- Click on the Groups tab from the main navigation to open the Groups management page
Creating a new user group
- On the Groups tab, click the Add User Group button
- A pop-up will appear requiring the following information:
- Group Name (required)
- Folders to Share within the group (required)
- Users to Add to the group
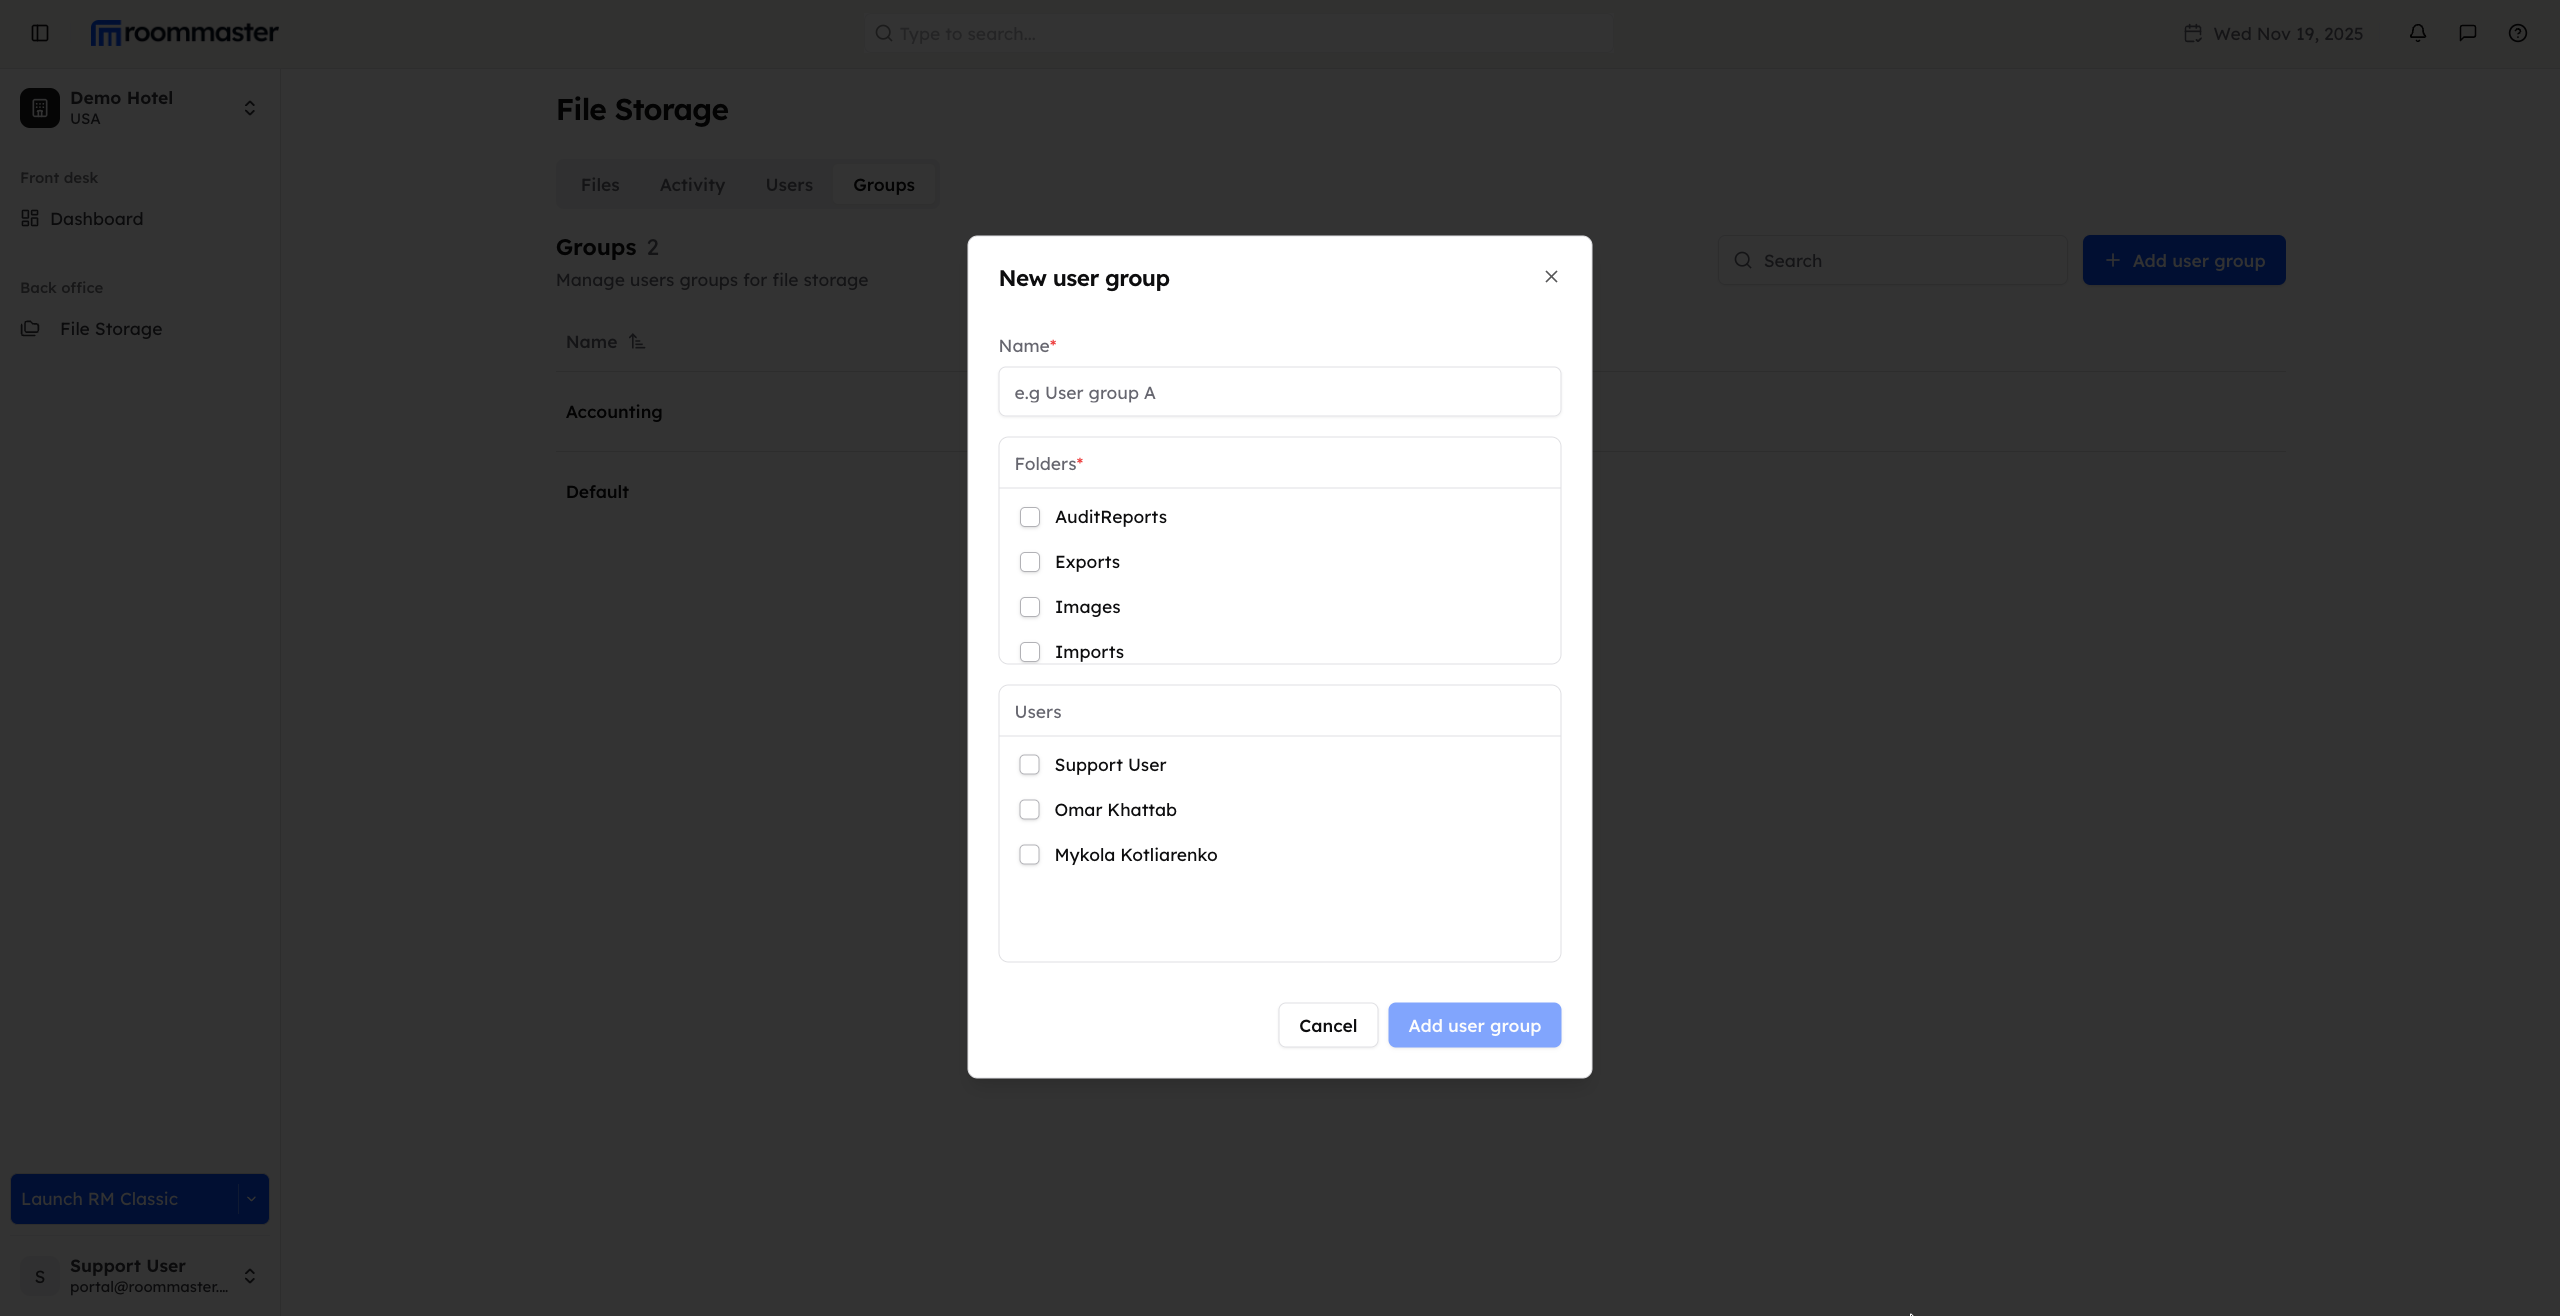
- Complete the required fields and click Create or Add user group to create the group
The created group will be displayed in the Groups tab.
Support
For additional support, please visit our Knowledge Base or contact our support team at support@roommaster.com.